Viewer3d - Overlaying
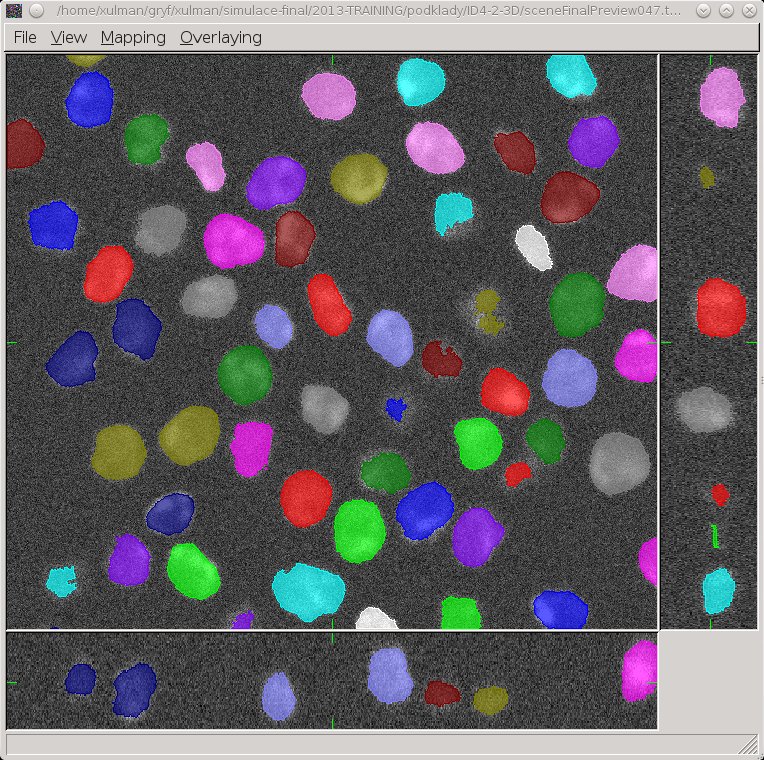
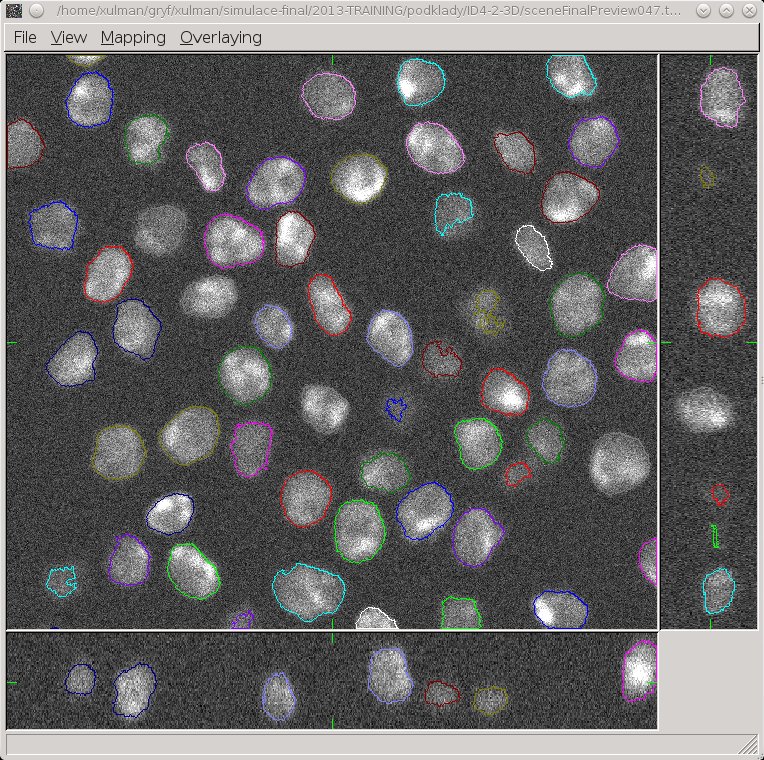
The overlay displaying regime may come handy when inspecting segmentation results. That is, when one have original grey scale or colour image along with a mask image.
The mask image is supposed to display results of the segmentation. It must be of the same size and resolution as the original image. It should display background with black (zero intensity). The foreground may be labelled (i.e., each component is displayd with its unique intensity) or the mask image is binary (i.e., foreground is just some non-zero value). The library assignes its own set of labels to the content of the mask image anyway.
The overlay is activated from File->Open overlay. First the original image is given, then it asks for the mask image. Notice that the new menu Overlaying becomes available.
The original image can be displayed and inspected as usually. On top of it, an overlay image can be displayed (Overlaying->Enable) either as whole components (default option, Overlaying->Components) or only as a boundary (Overlaying->Boundary). Especially in the former case, the Overlaying->Increase transparency option may be worth trying.